







To set up your @eir.net or @intred.net mailbox on a Samsung smartphone, make sure you have:
- A device with the Android Oreo operating system updated to version 8
- Internet access via the Intred network or, alternatively, via a mobile data connection;
- An active e-mail mailbox. If the mailbox is not @eir.net, make sure you have all the necessary configuration details provided by your provider;
- The mailbox configuration details.
Specifically, the details needed to set up the mailbox are:
- POP3/IMAP incoming mail server;
- Username and password;
- SMTP outgoing mail server;
- Any additional settings (SSL, authentication and ports, authenticated SMTP).
You can find your mailbox configuration details in the e-mail sent to you when your contract is activated, or in the box of the router delivered to your home (for subscriptions that include one).
FIRST SET-UP
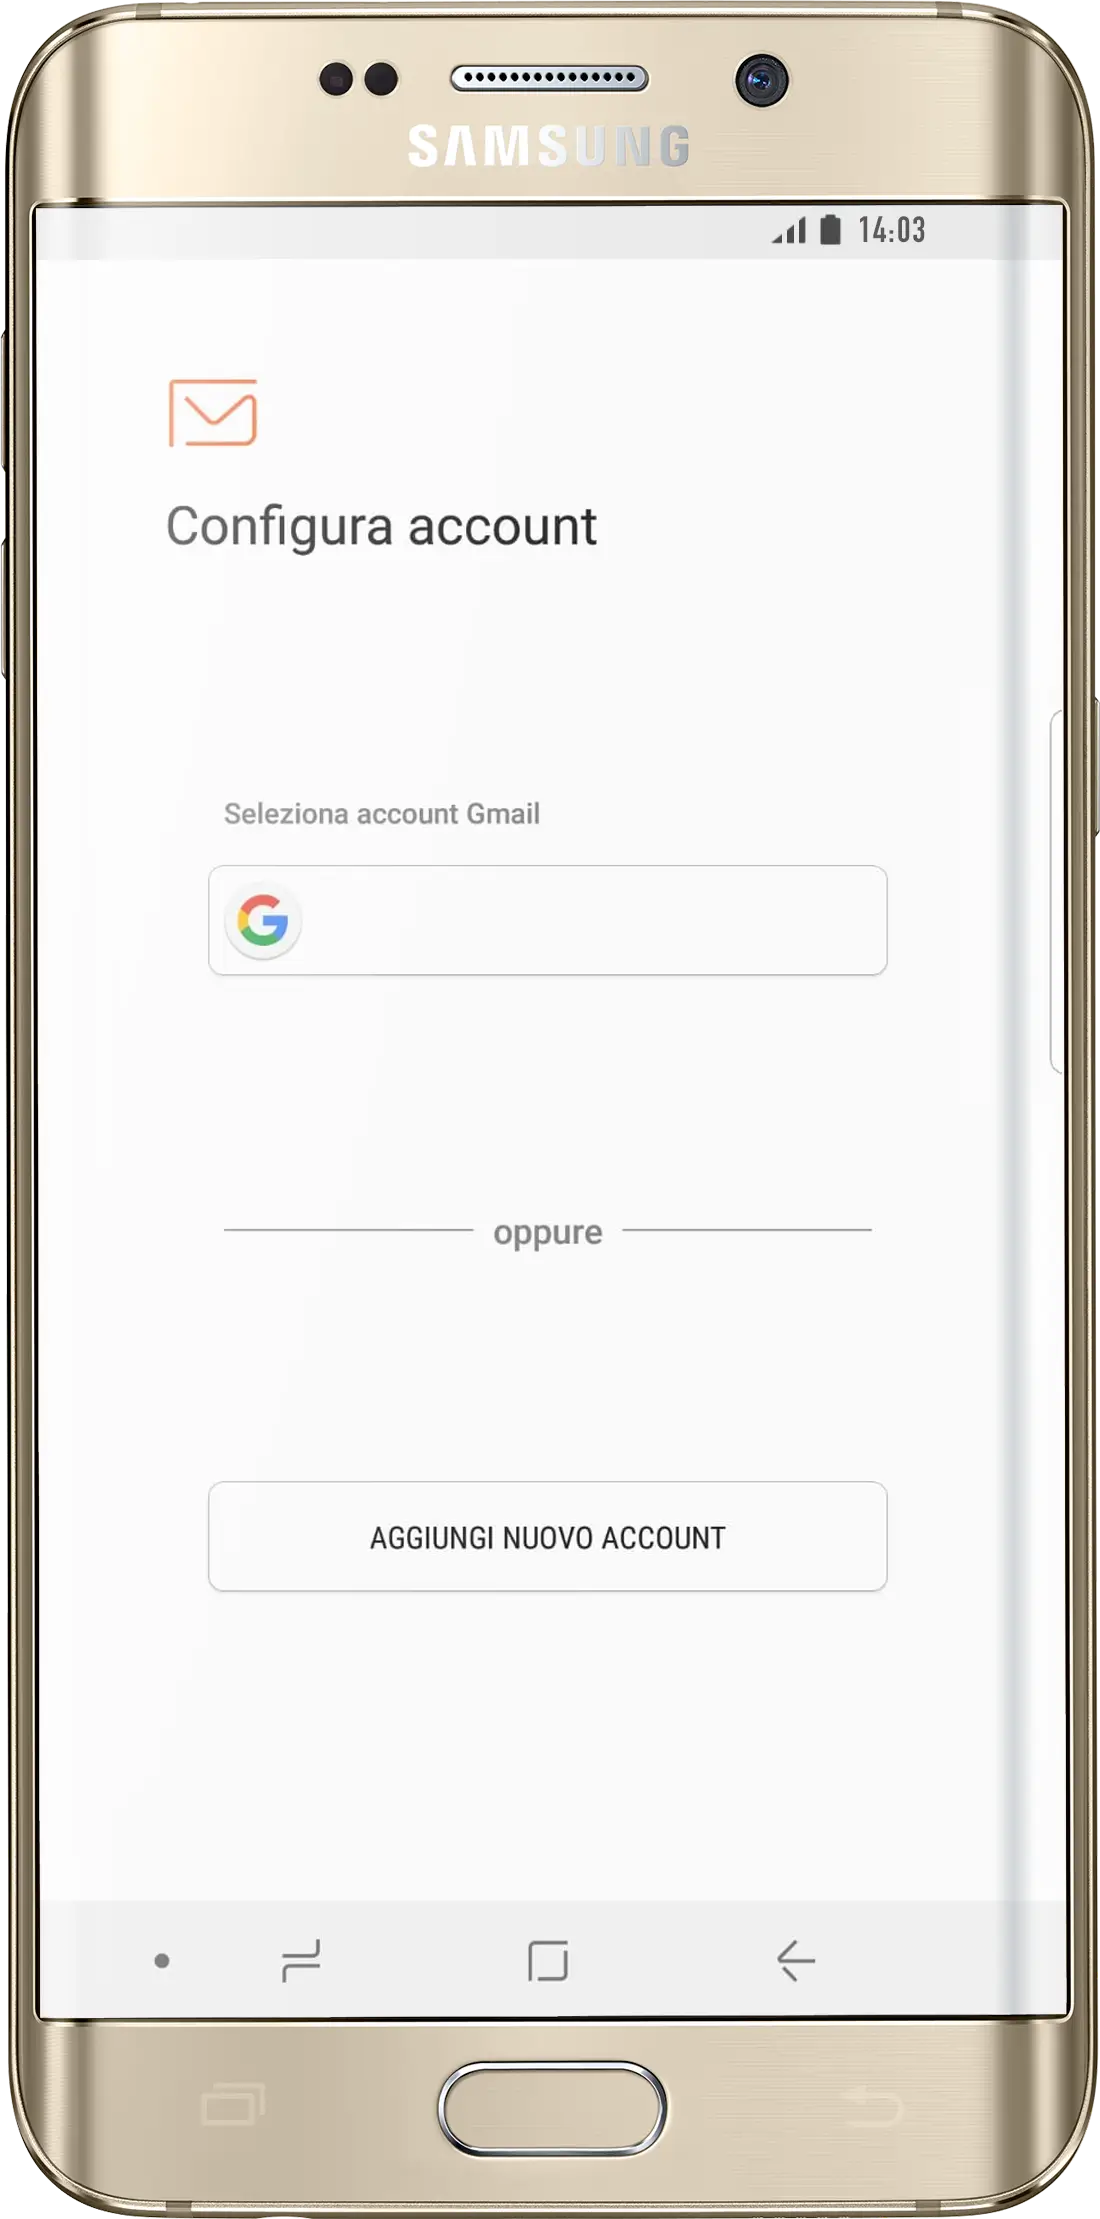
To start the set-up, open the Apps menu and tap the Email app icon:

If you have already set up a mailbox on the device, it will appear in the list of accounts. Then tap Add new account.
PROTOCOL
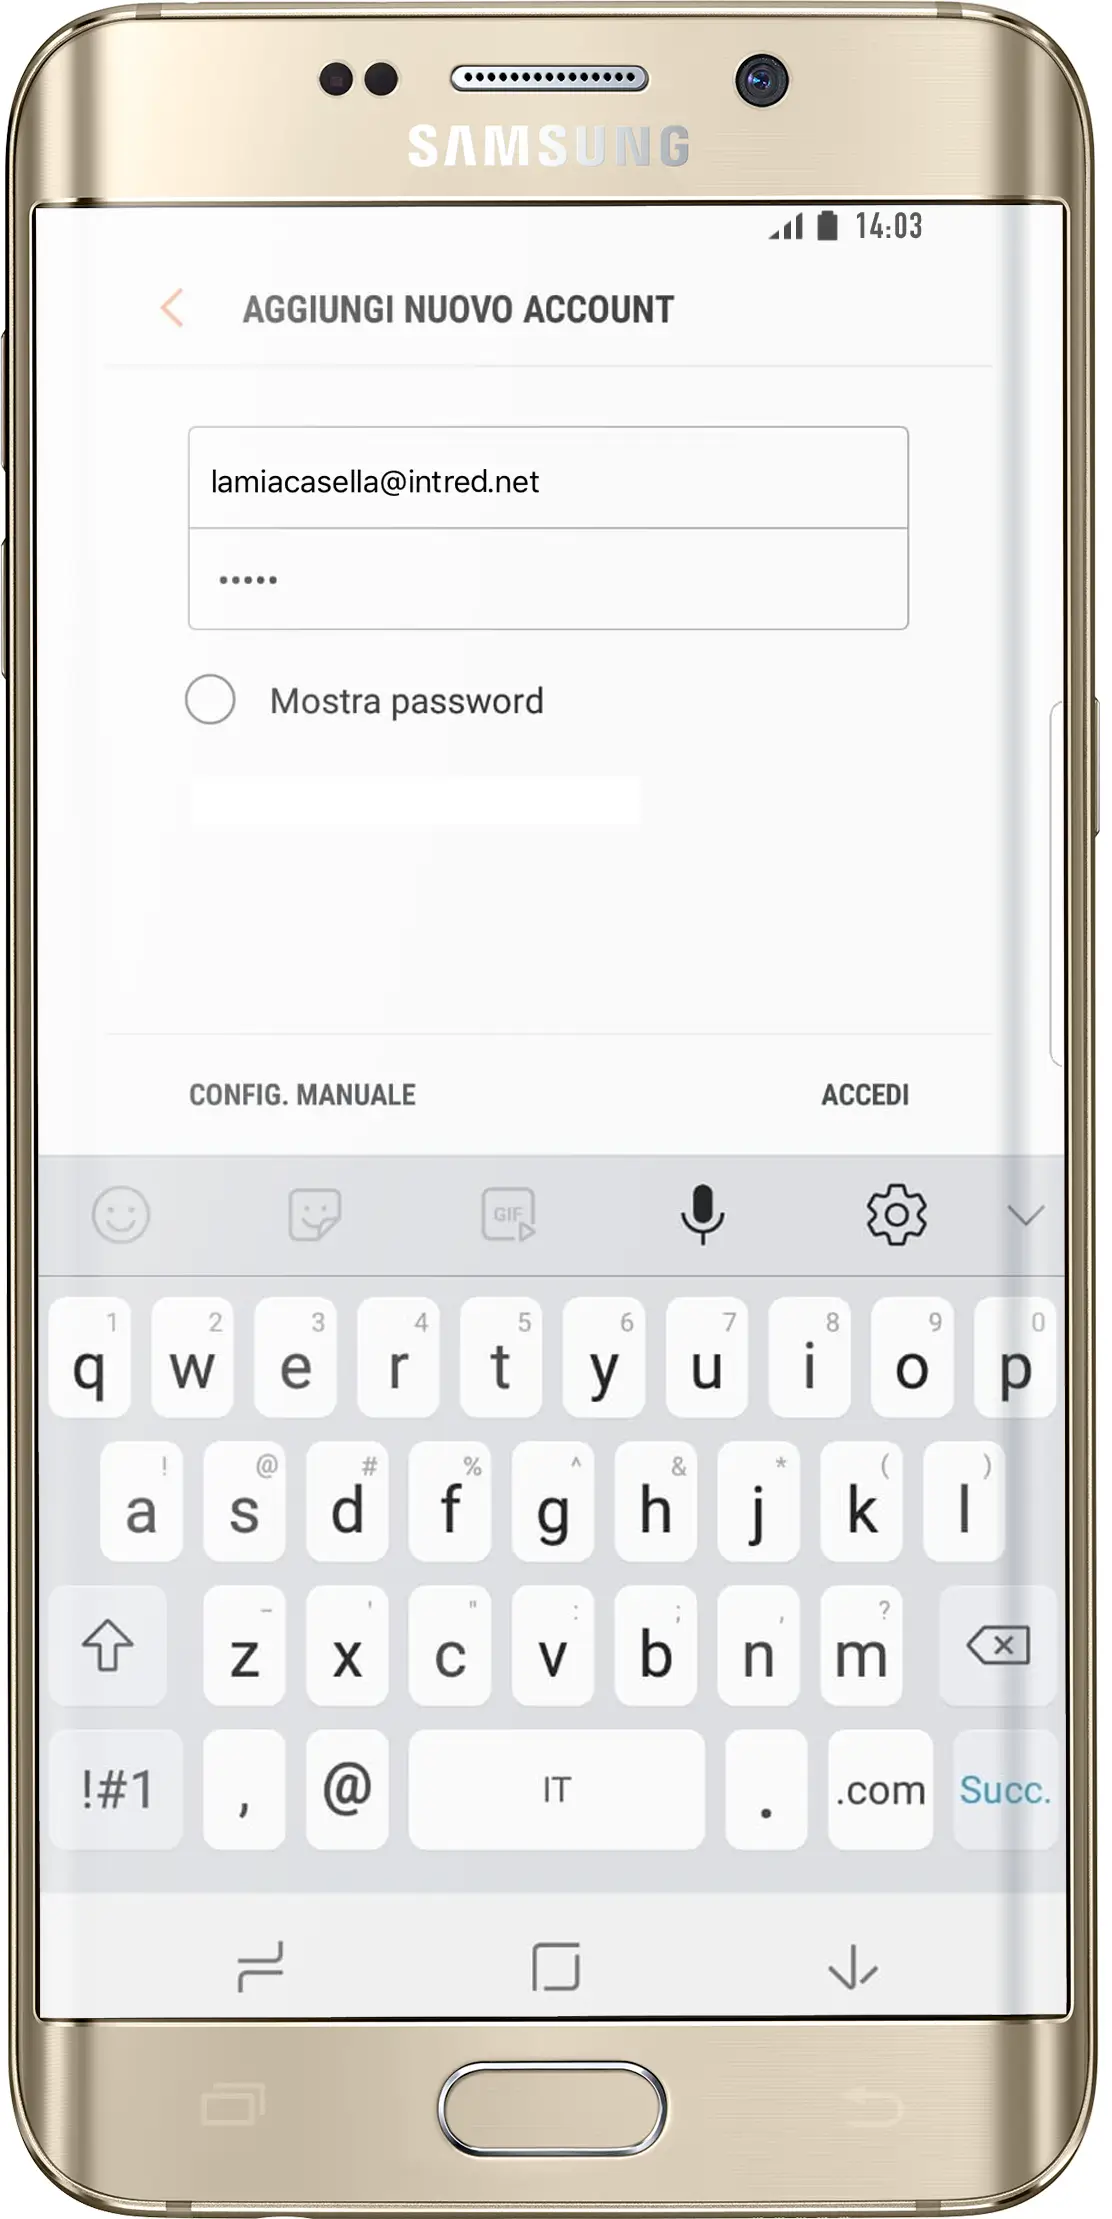
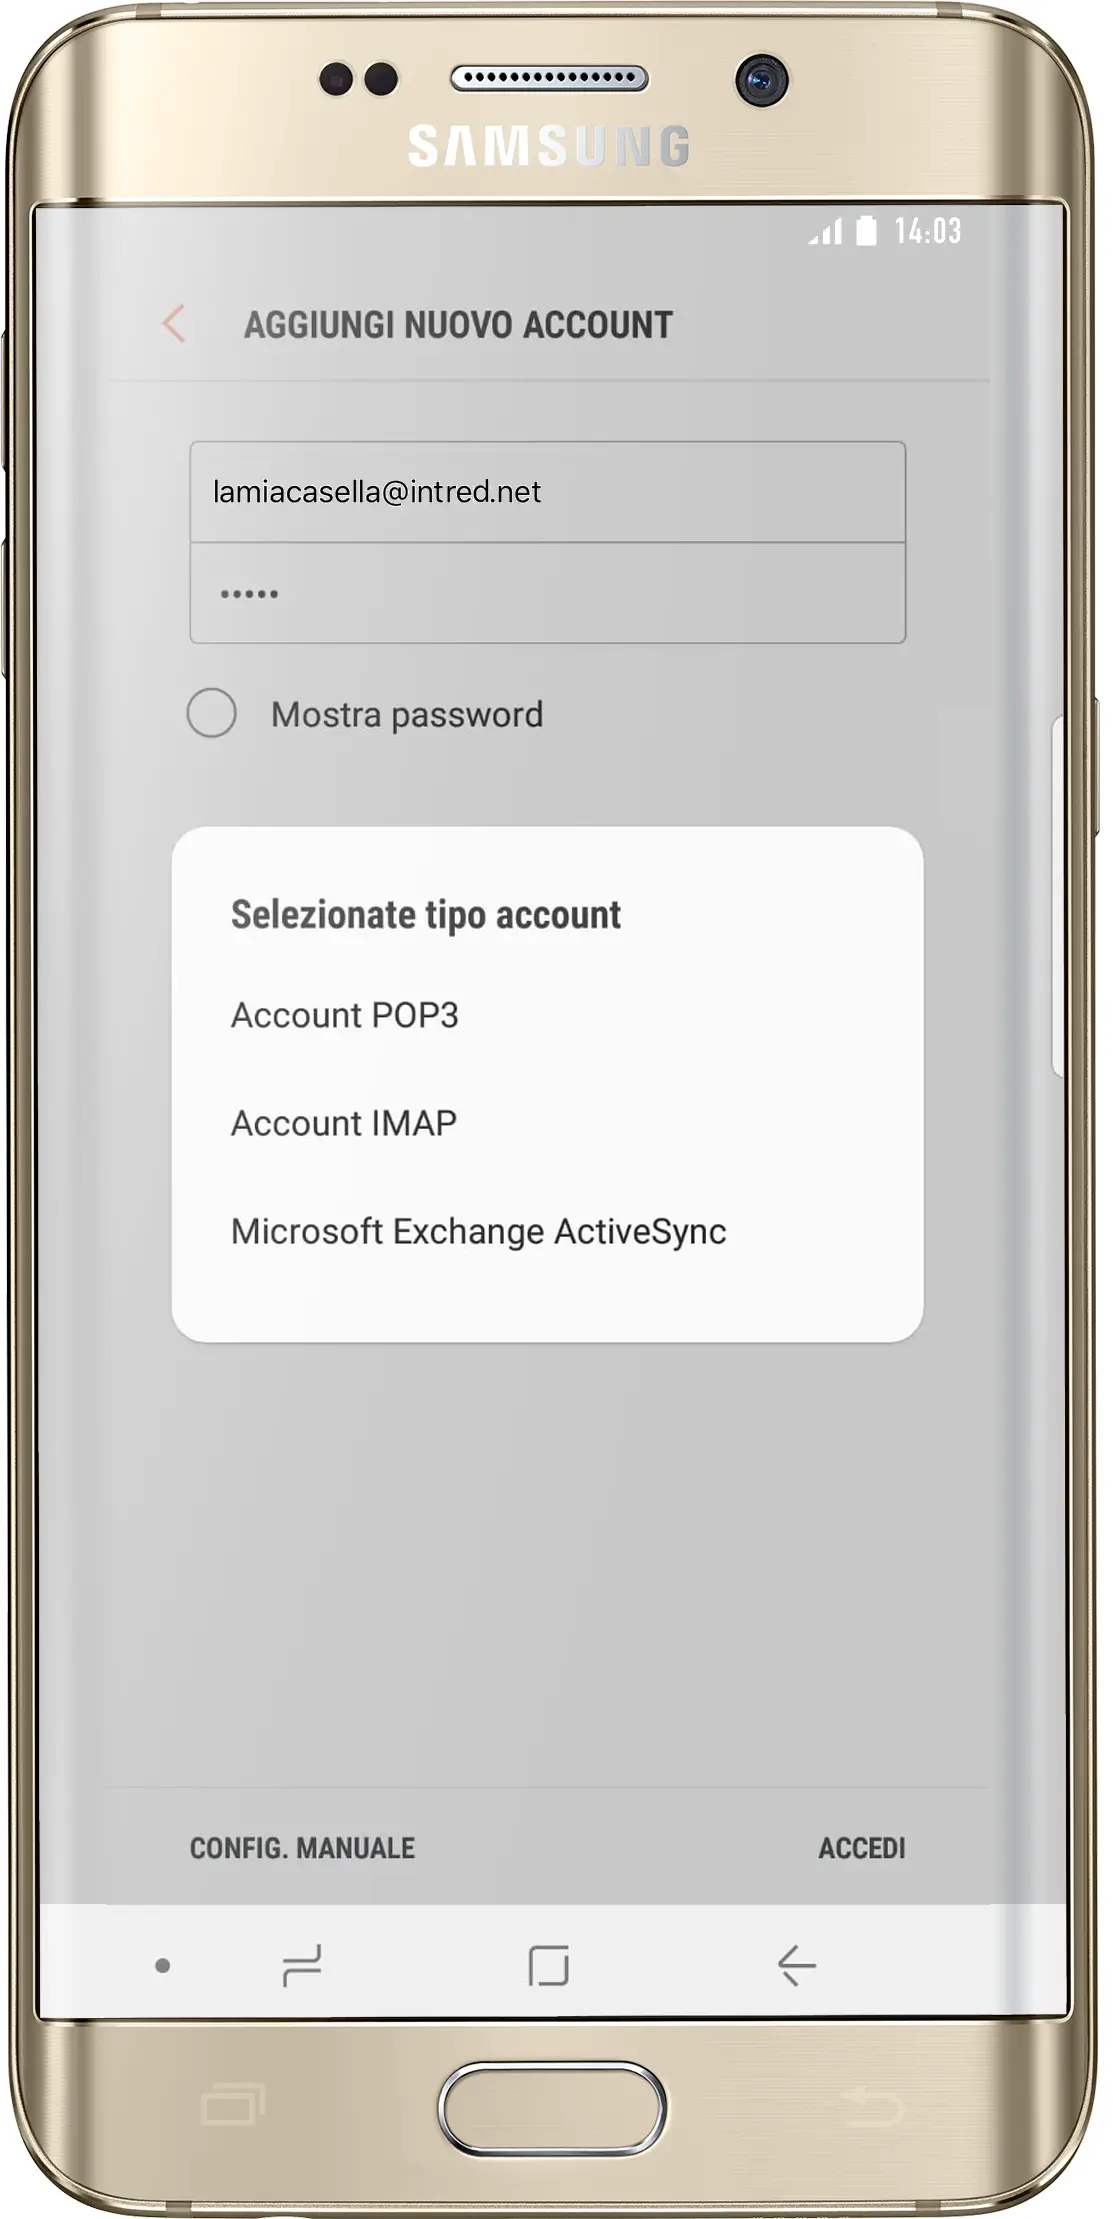
Enter the full address of your @eir.net or @intred.net mailbox and its password. Tap Sign in. You will now be asked whether you want to set up the account in POP3 or IMAP mode. The differences between the two modes are explained below:
IMAP:
Using the IMAP protocol, e-mails are synchronised between the server and all the devices on which the mailbox is set up. As a result, any operation carried out, such as deleting an e-mail, will be synchronised between the devices and the server.
POP3:
Using the POP3 protocol, on the other hand, e-mails are downloaded directly to the device. As a result, once an e-mail has been received, it will be saved only on the device, unless specific settings are used to keep a copy on the server. Then tap IMAP or POP3, depending on the mode chosen.
INCOMING MAIL PARAMETERS
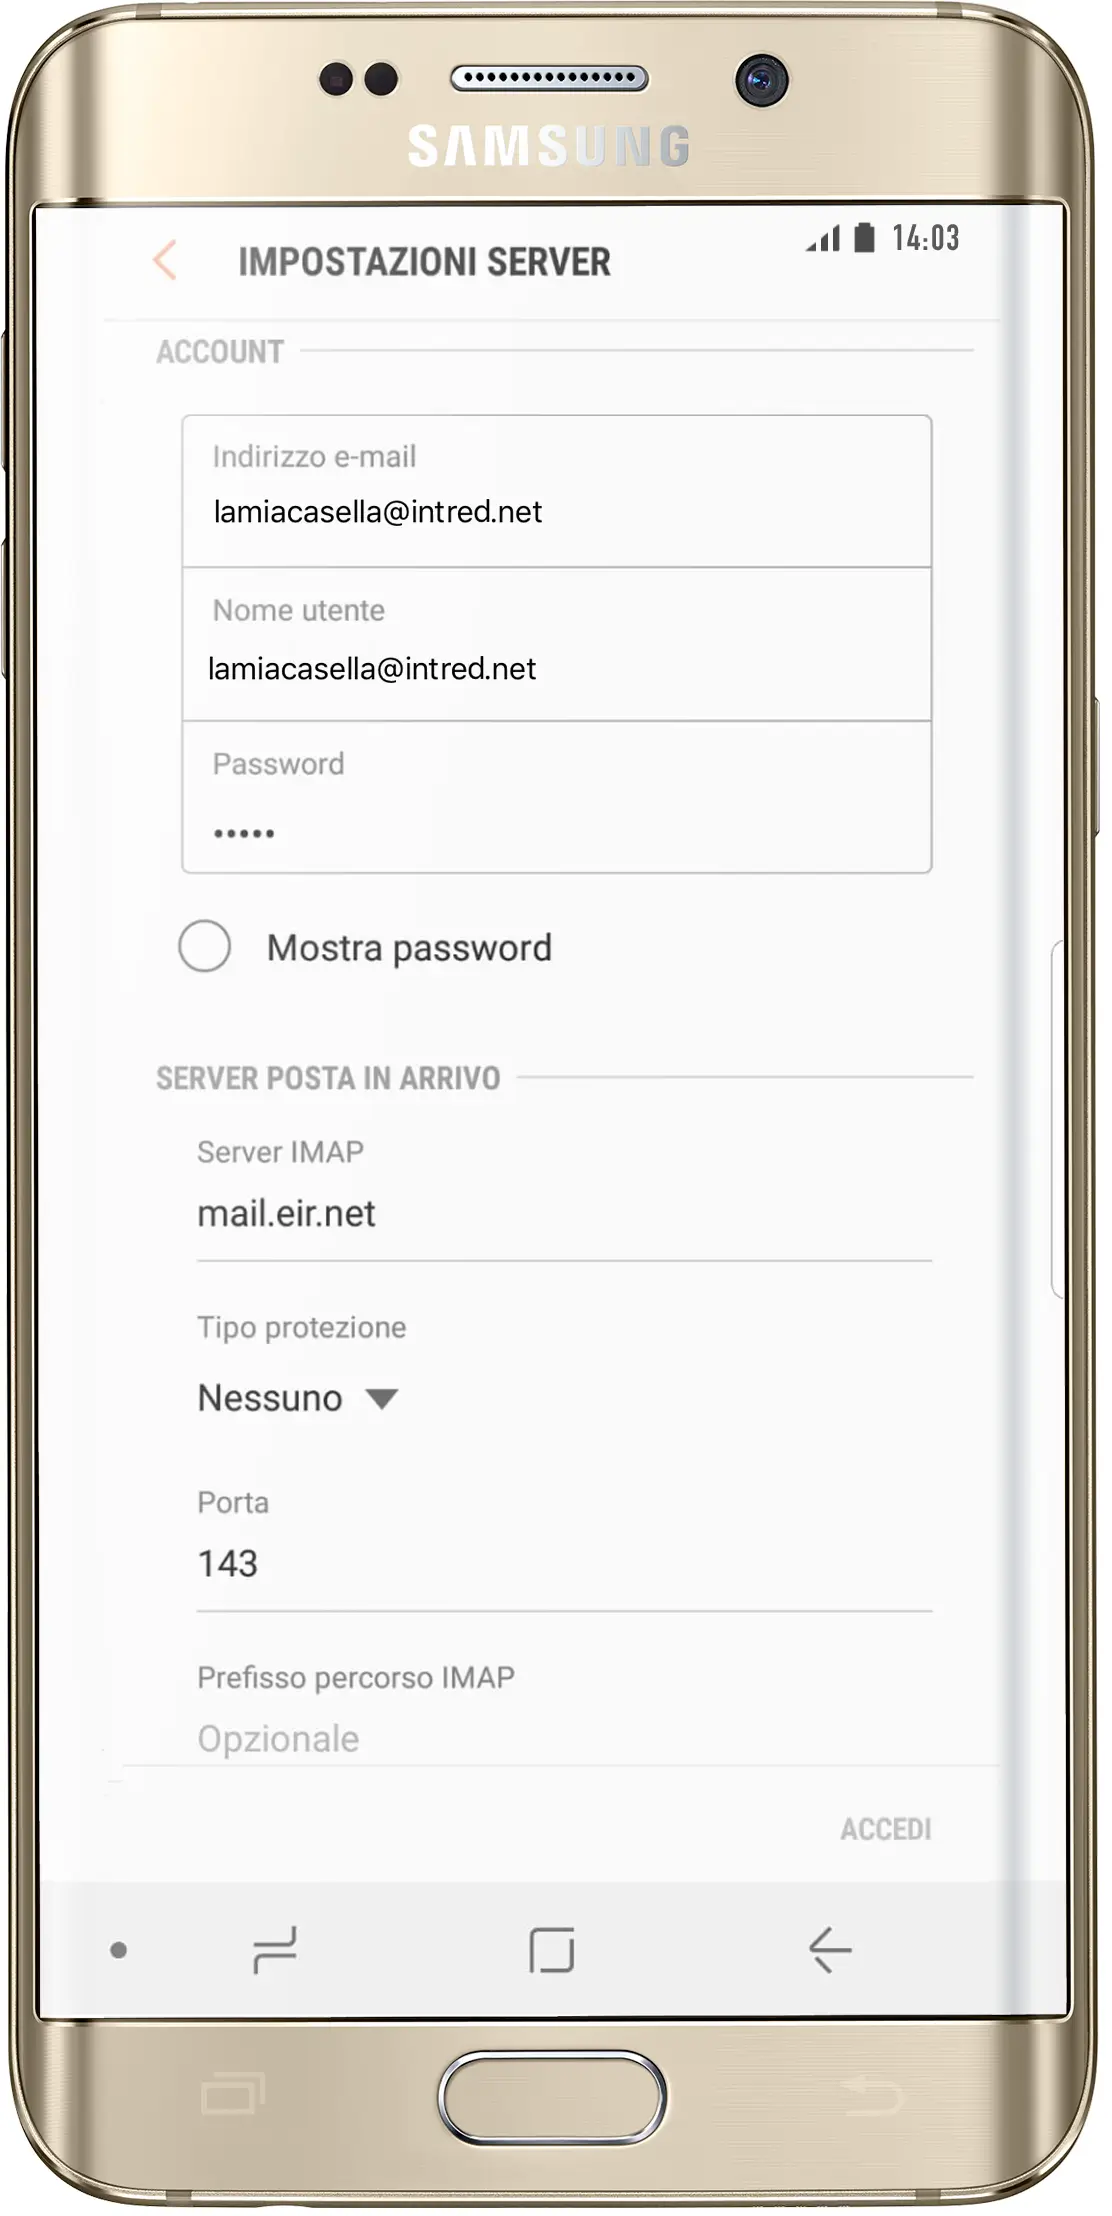
The values to enter will differ depending on the type of protocol chosen previously. The values to enter for both types of protocol are given below. The values in the Account section are the same for both protocols
IMAP INCOMING MAIL SERVER:
- User name: the full address of your mailbox
- Password: the password associated with your e-mail address
- Server: intred.net
- Port: leave the default value
- Security type: none
- IMAP path prefix: leave the field blank
POP3 INCOMING MAIL SERVER:
- User name: the full address of your mailbox
- Password: the password associated with your address
- Server: intred.net
- Port: leave the default value
- Security type: none
- Delete email from server: set as required. If you leave this set to Never, the mailbox could easily fill up. You will therefore need to log in to the webmail periodically, at http://mail.eir.net , and empty the mailbox.
Finally, tap Next.
OUTGOING MAIL PARAMETERS
After filling in the incoming mail values, scroll down the previous screen to enter the values for the SMTP outgoing mail server. The values for the Intred SMTP and the Intred authenticated SMTP are given below. Fill in the fields depending on the type of SMTP you have.
Intred SMTP
- SMTP server: smtp.eir.net Please note that the Intred SMTP only works from an Intred line. If you also need to send e-mail over another operator’s data line, that operator must give you the SMTP parameter to enter, or you can request activation of the authenticated SMTP service;
- Port: leave the default value
- Require sign-in: option disabled
AUTHENTICATED SMTP
Authenticated SMTP is an outgoing mail server that allows you to send e-mails regardless of your data operator, except for specific blocks imposed by the operator itself. To enable the authenticated SMTP service, you need to send us an activation request at tecnico@intred.net
- SMTP server: smtp-auth-r.intred.it
- Security type: none
- Port: leave the default value
- Require sign-in: option disabled
- User name: value given in the service activation e-mail
- Password: value given in the service activation e-mail
The images below show the configurations described above. Fill in the fields with the values given above, depending on the type of SMTP you have.
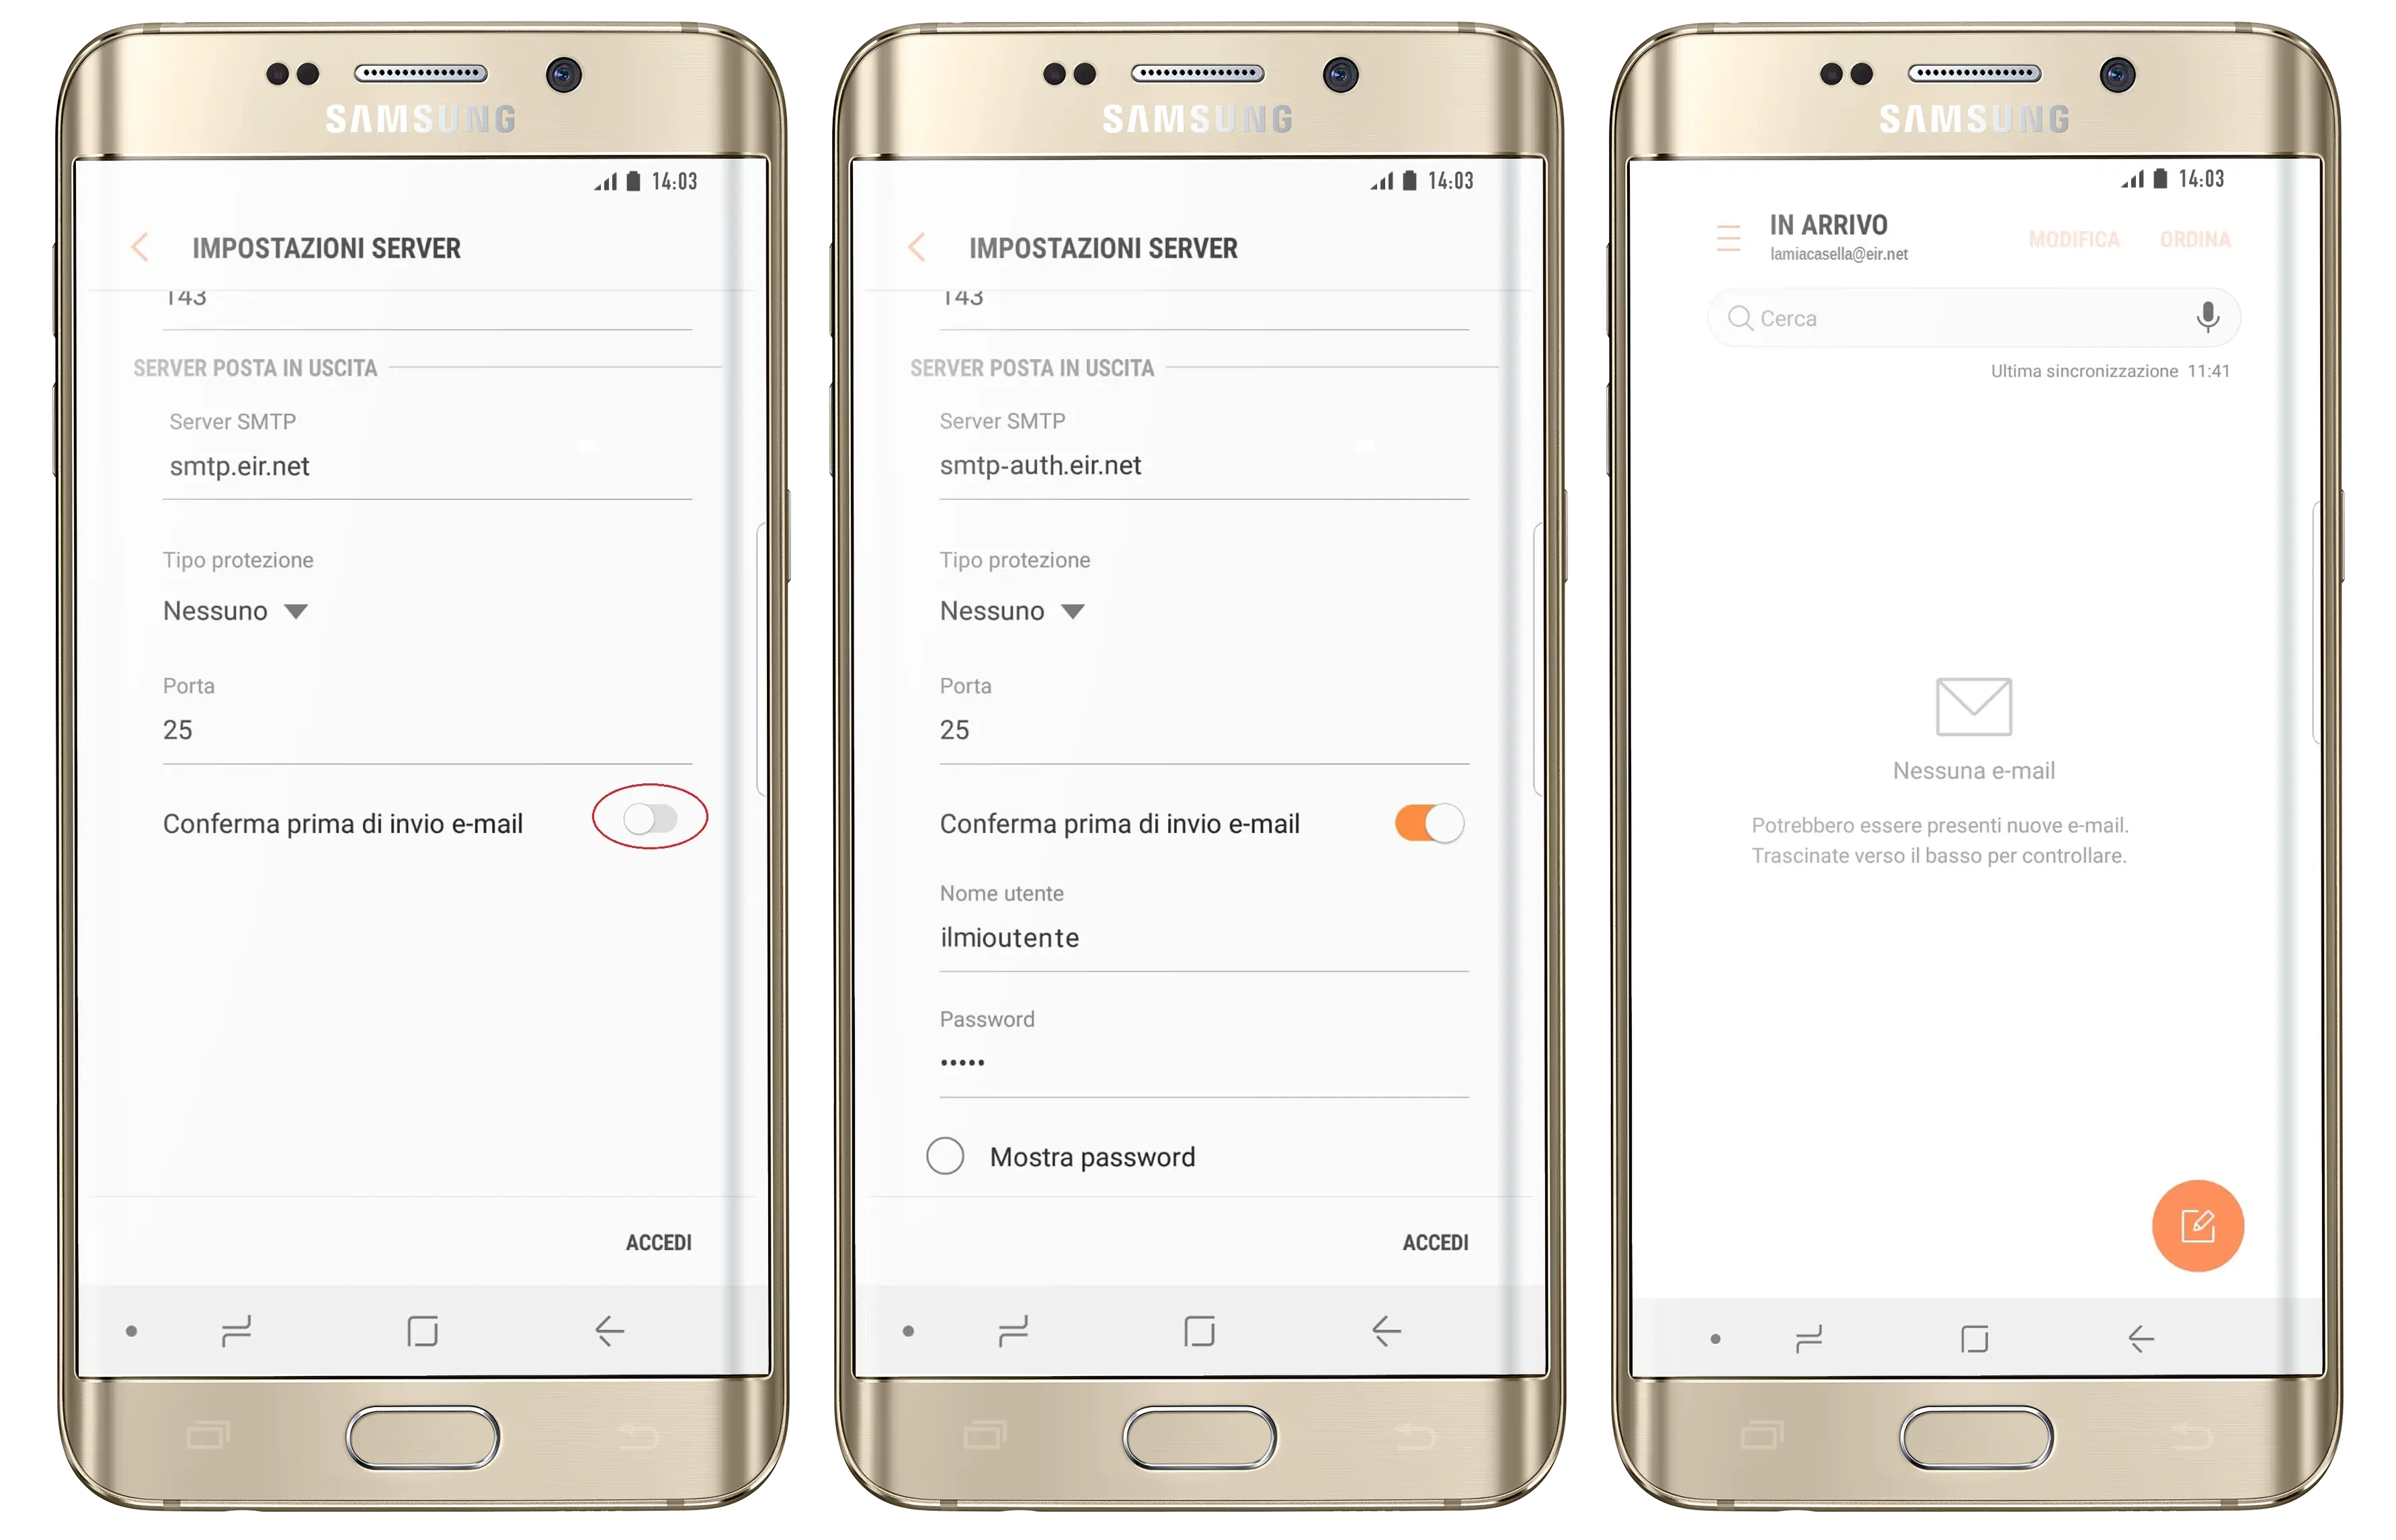
Tap Sign in. The account set-up is complete and you will be taken to the inbox screen.